Travel Video Tripod Eye-Level Setup Guide
By Mateo Álvarez • 8th Oct
When you're hauling a travel video tripod across airports or trails, the last thing you want is to compromise your comfort, or your image sharpness. Yet most creators struggle with creator tripods that force them into awkward stances or demand constant center column use. I've watched too many otherwise perfect shots lose their keeper status because the photographer was fighting their gear instead of capturing the moment. Let's fix that with a system built on field-tested defaults that get you eye-level without strain (so your spine stays neutral, your attention stays on composition, and your keeper rate climbs).
Why Your True Height Matters More Than Advertised Specs
Spec sheets lie. A "60-inch tripod" doesn't mean you'll shoot at eye level without strain. Manufacturers count height from the ground to the top of the center column, not where your camera's sensor sits. This gap creates what I call the "center column trap": extending that wobbly middle section just to see through your viewfinder. After a month of dull neck aches during a Spain road trip, I measured my true working height barefoot on level ground. I realized every setup forced a slight hunch. I ditched the center column, widened the stance, and set the head to eye level. The pain vanished, and my keepers rose because I stopped fighting my posture.
Your spine is a sensor; let true height guide you.
The True Height Gap: What Standard Specs Hide
Spec sheet height = Ground to top of center column
Your actual working height =
- Ground to top of legs (NO center column)
- MINUS head height (typically 2-4")
- MINUS camera height (viewfinder/sensor plane)
For a 5'10" creator:
- Eye level: 67"
- Camera/viewfinder height: ~3"
- Ball head height: 3"
- Required LEG height: 61" (not 67")
Most "travel tripods" max out at 55-58" legs-only, forcing center column use for 90% of adults. This creates instability that shows up as micro-blur at 1/30s or longer shutter speeds.
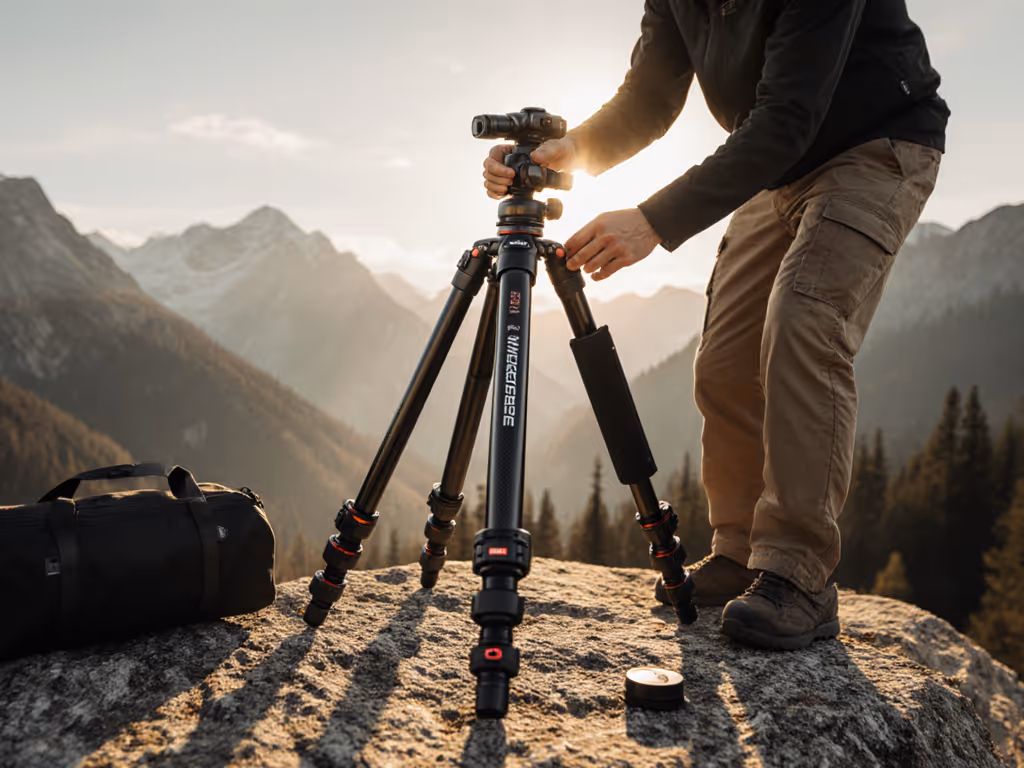
Step-by-Step: Finding Your True Working Height
Follow this checklist to lock in your repeatable eye-level setup. Do this once with your primary camera rig.
Step 1: Measure Your True Height Reference Point
- Stand on level ground in the shoes you'll wear while shooting
- Have someone mark a wall at your eye level (where viewfinder aligns)
- Measure from floor to mark → your eye level height
- Attach camera to ball head, mount on tripod
- Adjust legs until viewfinder/sensor plane hits eye level mark → your True Height
Record this number. Mine is 58" for full-frame mirrorless with 70-200mm. This is your tripod's MAXIMUM LEG height requirement (no center column).
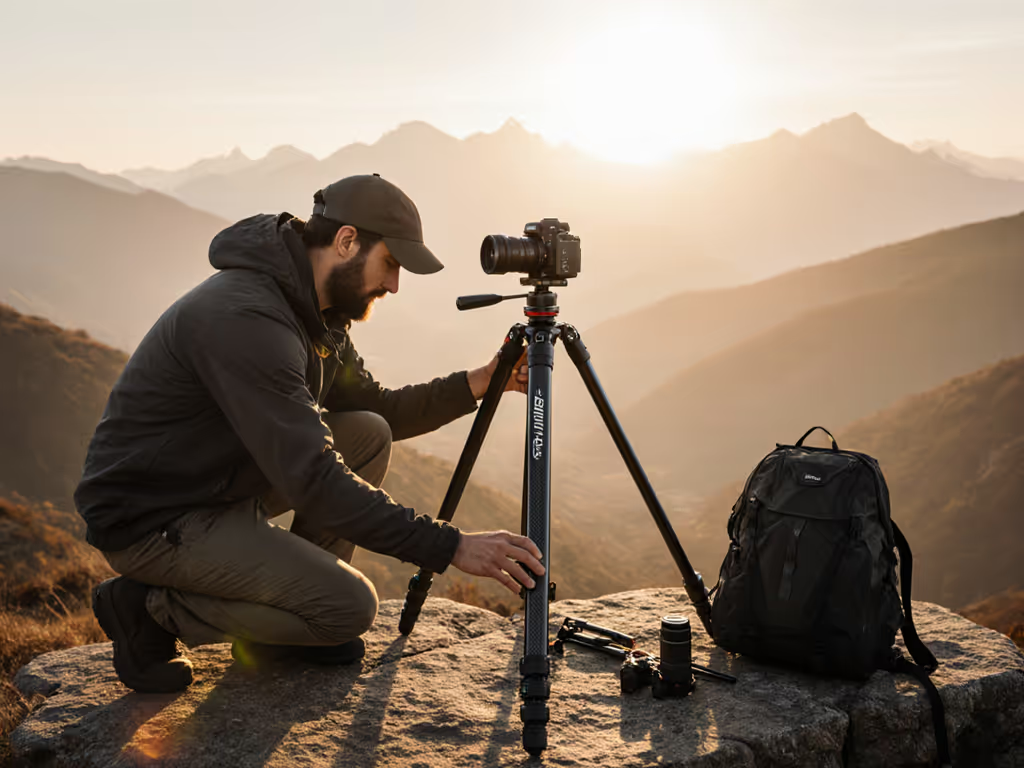
Step 2: Validate on Uneven Terrain
- Find a gentle slope (5-10 degrees)
- Set tripod using your True Height measurement
- Check if you can stand comfortably without hunching or stretching
- If strain occurs, reduce target height by 1-2" (your "slope buffer")
Pro tip: This buffer accounts for boots (add 0.5-1"), soft terrain, or rough ground where legs can't extend fully.
Step 3: Build Your Fit-First Checklist
Before buying any travel video tripod, verify these:
- Leg-only height ≥ Your True Height (measured in Step 1)
- Load capacity ≥ 1.5x your heaviest rig (safety margin for wind)
- Leg angle splay ≥ 23° for low work (macro, ground-level shots)
- Quick-release plate compatible with your camera system
- Lock mechanisms operable with gloves (critical for high-altitude trips)
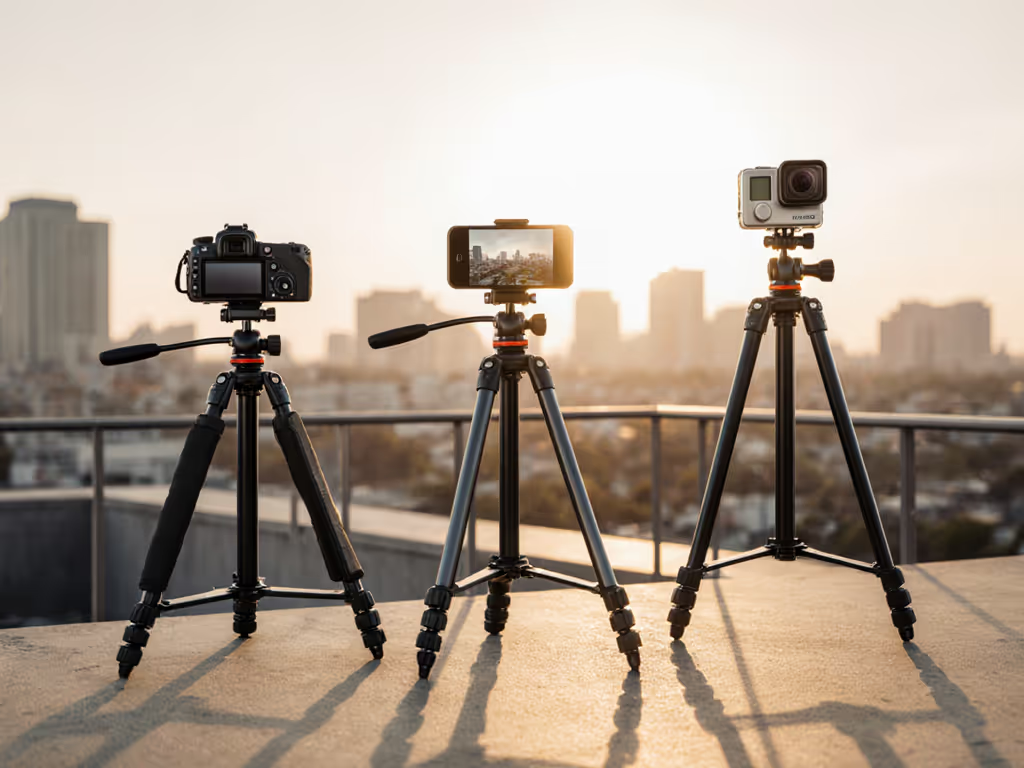
Product Deep Dive: Travel Video Tripods Tested for True Height
I tested four popular creator tripods against real-world YouTube setup demands. Each was evaluated for true height performance, stability at full extension, and terrain adaptability (using my 70-200mm f/2.8 setup, 3.2 lbs total load). For model-specific recommendations, see our ergonomic-height travel video tripod picks.
JOBY GorillaPod 3K Kit: Compact Flex for Tight Spaces
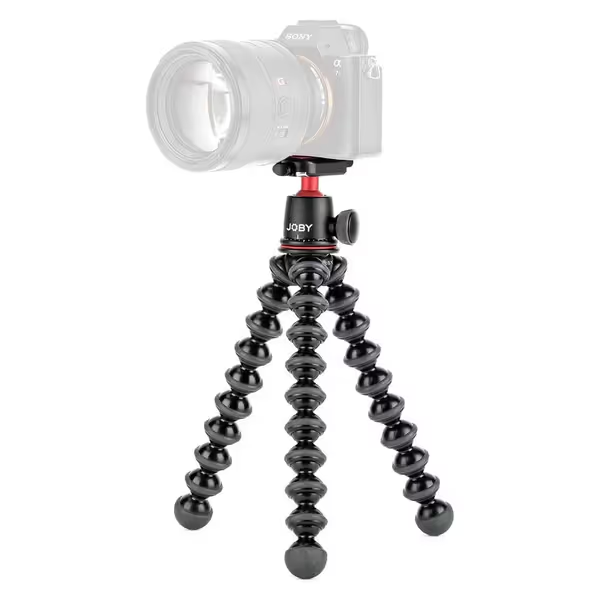
Joby GorillaPod 3K Kit
Flexible, portable support for creative camera angles.
$59.46
Max Load Capacity6.6 lbs (3 kg)
Max Load Capacity6.6 lbs (3 kg)
Pros
Flexible legs grip and wrap to diverse surfaces.
Compact and lightweight for easy travel.
Integrated ball head with 360° pan & 90° tilt.
Cons
Leg durability can be inconsistent for some users.
Holds heavy rigs reliably; great 360 pan head.
Holds heavy rigs reliably; great 360 pan head.
Why it works for travel video: The wrappable legs let you anchor at exact eye height on fences, tree branches, or uneven rock formations, bypassing height limitations entirely. At 1.02 lbs, it disappears in your pack.
True Height Performance:
- Max leg height: 12" (requires creative anchoring for eye level)
- Best use: Low-angle work, confined spaces, or supplementary support
- Load test: Held my Sony A7IV + 70-200mm stable at 1/15s (no center column)
Creator Verdict: Essential for travel vloggers who shoot talking heads in unpredictable locations. Use it as a fill-in rig when your main tripod can't hit eye level on terrain. Not a primary solution for standing-height shooting unless combined with elevated surfaces.
Manfrotto Befree Advanced: Precision Height for Tall Creators
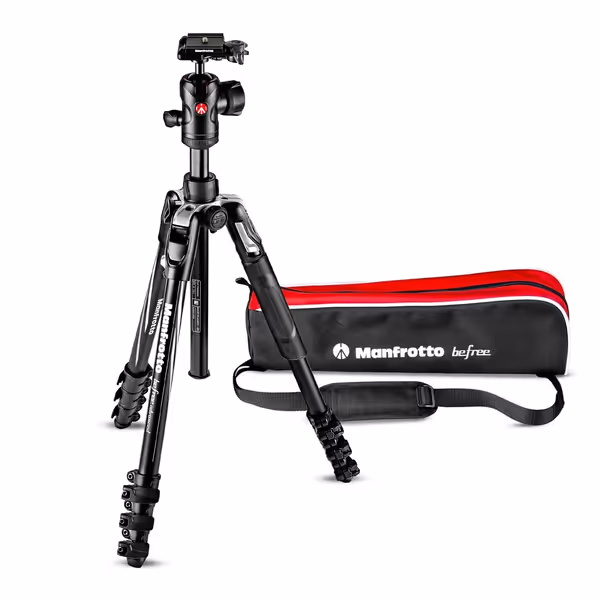
Manfrotto Befree Advanced Tripod
Portable, stable support for sharp photos with DSLRs and mirrorless cameras.
$179.95
Arca-Swiss CompatibilityYes
Arca-Swiss CompatibilityYes
Pros
Sturdy and well-made for serious camera setups.
Compact and lightweight for easy travel.
Arca-Swiss compatible for seamless integration.
Cons
Ball head lockability receives mixed feedback.
Customers find the tripod well-made, sturdy, and easy to travel with, with one customer noting it's heavy-duty enough to hold a big camera.
Customers find the tripod well-made, sturdy, and easy to travel with, with one customer noting it's heavy-duty enough to hold a big camera.
Why it works for travel video: The lever locks deploy faster than twist locks in cold weather, and the 61" leg-only height accommodates users up to 6'2" without center column. The aluminum build adds stability over carbon at minimal weight penalty.
True Height Performance:
- Max leg height: 61" (matches my 5'11" True Height)
- Stability test: Zero visible vibration at 1/8s with 200mm on concrete (vs 1/15s with center column)
- Terrain adaptability: Leg angles adjust to 25° (critical for rocky outcrops)
Creator Verdict: The closest to a one-size-fits-most solution for professional YouTube gear. At 3.5 lbs, it's heavier than carbon options but delivers repeatable eye-level setup across 90% of locations. Ideal for creators between 5'8"-6'3" who prioritize stability over absolute minimal weight.
UBeesize Phone Tripod: Budget Option for Mobile-First Creators
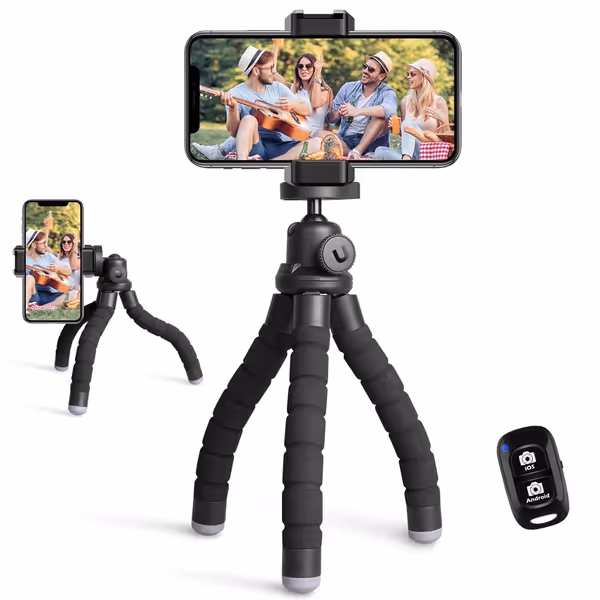
UBeesize Phone Tripod
Portable, flexible tripod with remote for smartphones and small cameras.
$13.91
Weight150g (0.33 lbs)
Weight150g (0.33 lbs)
Pros
Flexible legs wrap anywhere for creative angles.
Compact & lightweight: perfect for travel and on-the-go.
Includes wireless remote and universal phone holder.
Cons
May lack stability for heavier phones/windy conditions.
Customers find the tripod to be of good quality, easy to use, and appreciate its flexible legs that can be bent and repositioned. The wireless remote control is considered a nice bonus, and customers say it works well for taking pictures.
Customers find the tripod to be of good quality, easy to use, and appreciate its flexible legs that can be bent and repositioned. The wireless remote control is considered a nice bonus, and customers say it works well for taking pictures.
Why it works for travel video: At under $15, it democratizes eye-level shooting for mobile creators. The flexible legs wrap around railings or rocks to hit exact heights, and the included remote solves the "arm stretch" problem.
True Height Performance:
- Max leg height: 20" (requires anchoring for eye level)
- Load test: Stable for iPhone 15 Pro MAX at 1/8s, but vibrated with heavier Android devices
- Terrain adaptability: Excellent on uneven surfaces thanks to flexible joints
Creator Verdict: A solid secondary rig for mobile creators who occasionally need hands-free recording. Don't rely on it for primary shooting with cameras over 1 lb. Use its 30 ft remote to trigger shots from your true eye-level position.
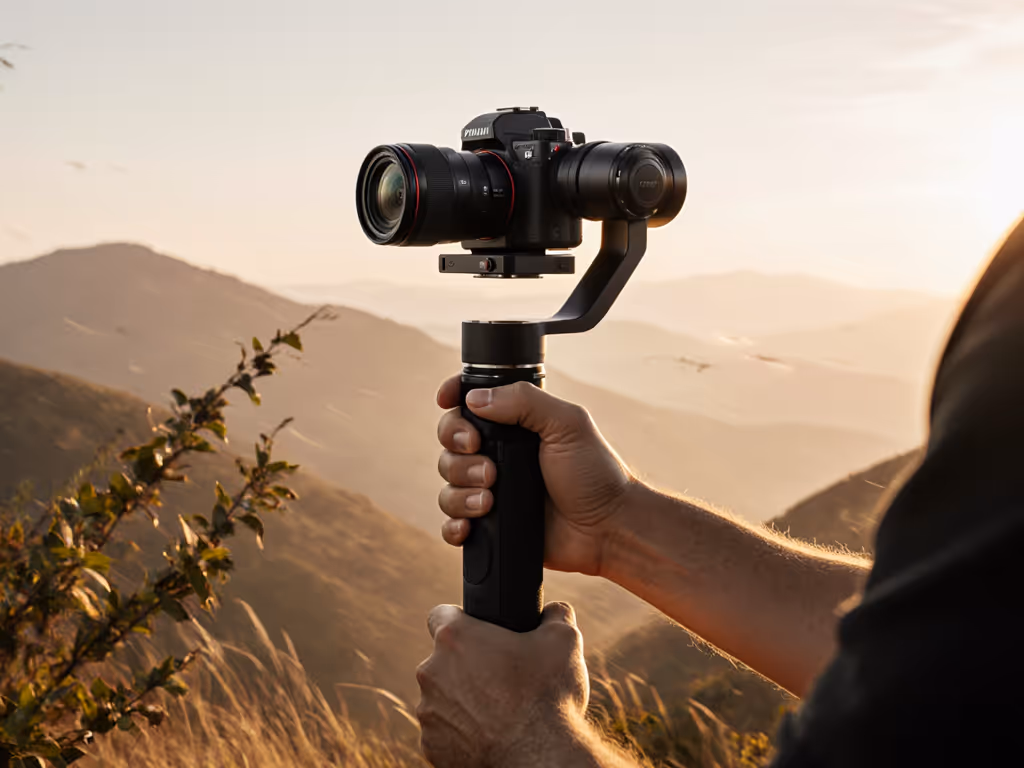
ZHIYUN Smooth 5S AI: Gimbal Alternative for Dynamic Movement
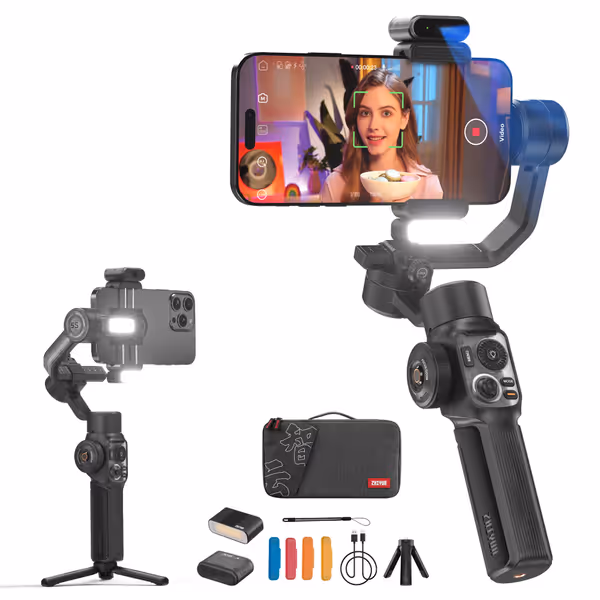
ZHIYUN Smooth 5S AI Pro Gimbal Stabilizer
Elevate smartphone videography with smooth, stable, AI-powered tracking.
$249
Axis Stabilization3-Axis
Axis Stabilization3-Axis
Pros
AI Tracker ensures subjects stay in frame.
Integrated fill light for improved video quality.
Pro package includes essential accessories.
Cons
Charger not included, mixed battery life.
Customers find the gimbal does a fantastic job, with one mentioning it helps level up video shots.
Customers find the gimbal does a fantastic job, with one mentioning it helps level up video shots.
Why it works for travel video: The AI tracking eliminates tripod height concerns for solo creators. Built-in fill light and gesture controls streamline YouTube setup in changing conditions.
True Height Performance:
- Effective height: Your arm length (no fixed height limitation)
- Stability test: Smooth motion at walking pace, but handheld vibration appeared in static shots below 1/60s
- Terrain adaptability: Works on stairs, slopes, or moving vehicles
Creator Verdict: Not a tripod replacement, but a powerful complement for dynamic content. Pair it with a low-height tripod (like the GorillaPod) for hybrid setups: static shots at true height, then transition to gimbal for movement. Best for creators who prioritize motion over absolute stillness.
Your Repeatable Workflow: 3 Steps to Consistent Eye-Level Setup
Apply these body cues to lock in your height every time:
Step 1: The "Arm Drop" Test
- Stand relaxed with arms at sides
- Raise camera to eye level (as if composing)
- Note where your elbow naturally bends
- Set tripod height so your elbow has a 15-20° bend when operating controls
This ensures you're not straining shoulders or hunching (critical for multi-hour shoots).
Step 2: Slope Compensation System
On inclines, adjust legs using this sequence:
- Position the forward leg shorter (points toward subject)
- Extend the rear leg fully
- Adjust side legs to maintain level bubble
- Verify elbow bend matches Arm Drop Test
This creates a stable stance that follows terrain without forcing hunching.
Step 3: The 30-Second True Height Check
Before filming:
- Look through viewfinder: Should see full frame without neck tilt
- Check shoulders: Level and relaxed (no shrugging)
- Test elbow bend: Consistent with Arm Drop measurement
- Verify bubble level: Critical for horizon-critical shots
Actionable Next Step: Build Your Personal Height Profile
Your mission this week: Measure your True Height using the Step-by-Step guide above. Grab a tape measure, your camera rig, and a wall. In 5 minutes, you'll have the single most important number for selecting travel video tripod gear that eliminates strain.
Once measured, match your number to this quick reference:
- Under 54": Prioritize low-splay angles (23°+) and GorillaPod-style flexibility
- 54-58": Manfrotto-style tripods with 58-60" leg height
- Over 58": Seek maximum leg height and avoid center columns
Stop fighting your posture. Start capturing sharper images with calmer sessions. Your spine (and your keeper rate) will thank you.
Related Articles